文章目录
前言完整源码下载链接:[/download/DeepLearning_/87290571](/download/DeepLearning_/87290571)一、效果展示1.山体拼接效果(3张原图)2.建筑拼接效果(5张原图)3.房间图像拼接(3张原图)二、使用步骤1.引入库2.主体函数总结前言
图像拼接是将同一场景的多个重叠图像拼接成较大的图像的一种方法,在医学成像、计算机视觉、卫星数据、军事目标自动识别等领域应用广泛。图像拼接的输出是两个输入图像的并集。
所谓图像拼接就是将两张有共同拍摄区域的图像无缝拼接在一起。这种应用可应用于车站的动态检测、商城的人流检测、十字路口的交通检测等,给人以全景图像,告别目前的监控墙或视频区域显示的时代,减轻工作人员“眼”的压力。本文介绍python+opencv实现多张图片(3张+)拼接任务。
提示:以下是本篇文章正文内容,下面案例可供参考
完整源码
下载链接:/download/DeepLearning_/87290571
一、效果展示
1.山体拼接效果(3张原图)
原始图片
拼接后效果:
2.建筑拼接效果(5张原图)
原始图片
拼接后效果:
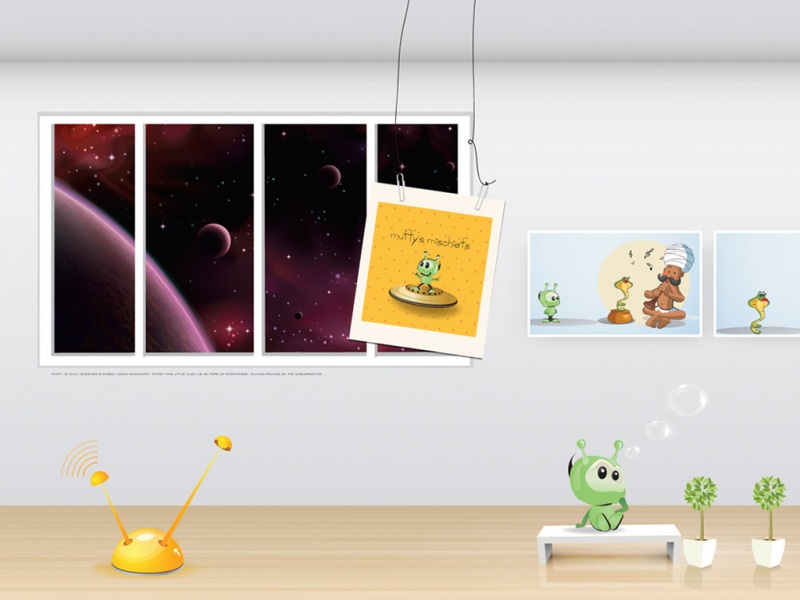
3.房间图像拼接(3张原图)
原始图片
拼接后效果:
二、使用步骤
1.引入库
代码如下(示例):
import numpy as npimport cv2import sysfrom matchers import matchersimport time
2.主体函数
代码如下(示例):
class Stitch:def __init__(self, args):self.path = argsfp = open(self.path, 'r')filenames = [each.rstrip('\r\n') for each in fp.readlines()]print filenamesself.images = [cv2.resize(cv2.imread(each),(480, 320)) for each in filenames]self.count = len(self.images)self.left_list, self.right_list, self.center_im = [], [],Noneself.matcher_obj = matchers()self.prepare_lists()def prepare_lists(self):print "Number of images : %d"%self.countself.centerIdx = self.count/2 print "Center index image : %d"%self.centerIdxself.center_im = self.images[int(self.centerIdx)]for i in range(self.count):if(i<=self.centerIdx):self.left_list.append(self.images[i])else:self.right_list.append(self.images[i])print "Image lists prepared"def leftshift(self):# self.left_list = reversed(self.left_list)a = self.left_list[0]for b in self.left_list[1:]:H = self.matcher_obj.match(a, b, 'left')print "Homography is : ", Hxh = np.linalg.inv(H)print "Inverse Homography :", xhds = np.dot(xh, np.array([a.shape[1], a.shape[0], 1]));ds = ds/ds[-1]print "final ds=>", dsf1 = np.dot(xh, np.array([0,0,1]))f1 = f1/f1[-1]xh[0][-1] += abs(f1[0])xh[1][-1] += abs(f1[1])ds = np.dot(xh, np.array([a.shape[1], a.shape[0], 1]))offsety = abs(int(f1[1]))offsetx = abs(int(f1[0]))dsize = (int(ds[0])+offsetx, int(ds[1]) + offsety)print "image dsize =>", dsizetmp = cv2.warpPerspective(a, xh, dsize)# cv2.imshow("warped", tmp)# cv2.waitKey()tmp[offsety:b.shape[0]+offsety, offsetx:b.shape[1]+offsetx] = ba = tmpself.leftImage = tmpdef rightshift(self):for each in self.right_list:H = self.matcher_obj.match(self.leftImage, each, 'right')print "Homography :", Htxyz = np.dot(H, np.array([each.shape[1], each.shape[0], 1]))txyz = txyz/txyz[-1]dsize = (int(txyz[0])+self.leftImage.shape[1], int(txyz[1])+self.leftImage.shape[0])tmp = cv2.warpPerspective(each, H, dsize)cv2.imshow("tp", tmp)cv2.waitKey()# tmp[:self.leftImage.shape[0], :self.leftImage.shape[1]]=self.leftImagetmp = self.mix_and_match(self.leftImage, tmp)print "tmp shape",tmp.shapeprint "self.leftimage shape=", self.leftImage.shapeself.leftImage = tmp# self.showImage('left')def mix_and_match(self, leftImage, warpedImage):i1y, i1x = leftImage.shape[:2]i2y, i2x = warpedImage.shape[:2]print leftImage[-1,-1]t = time.time()black_l = np.where(leftImage == np.array([0,0,0]))black_wi = np.where(warpedImage == np.array([0,0,0]))print time.time() - tprint black_l[-1]for i in range(0, i1x):for j in range(0, i1y):try:if(np.array_equal(leftImage[j,i],np.array([0,0,0])) and np.array_equal(warpedImage[j,i],np.array([0,0,0]))):# print "BLACK"# instead of just putting it with black, # take average of all nearby values and avg it.warpedImage[j,i] = [0, 0, 0]else:if(np.array_equal(warpedImage[j,i],[0,0,0])):# print "PIXEL"warpedImage[j,i] = leftImage[j,i]else:if not np.array_equal(leftImage[j,i], [0,0,0]):bw, gw, rw = warpedImage[j,i]bl,gl,rl = leftImage[j,i]# b = (bl+bw)/2# g = (gl+gw)/2# r = (rl+rw)/2warpedImage[j, i] = [bl,gl,rl]except:pass# cv2.imshow("waRPED mix", warpedImage)# cv2.waitKey()return warpedImagedef trim_left(self):passdef showImage(self, string=None):if string == 'left':cv2.imshow("left image", self.leftImage)# cv2.imshow("left image", cv2.resize(self.leftImage, (400,400)))elif string == "right":cv2.imshow("right Image", self.rightImage)cv2.waitKey()if __name__ == '__main__':try:args = sys.argv[1]except:args = "txtlists/files1.txt"finally:print "Parameters : ", argss = Stitch(args)s.leftshift()# s.showImage('left')s.rightshift()print "done"cv2.imwrite("test12.jpg", s.leftImage)print "image written"cv2.destroyAllWindows()
总结
图像拼接通常用到以下五个步骤:
图像拼接并非简单的将两张有共同区域的图像把相同的区域重合起来,由于两张图像拍摄的角度与位置不同,虽然有共同的区域,但拍摄时相机的内参与外参均不相同,所以简单的覆盖拼接是不合理的。因此,对于图像拼接需要以一张图像为基准对另外一张图像进行相应的变换(透视变换),然后将透视变换后的图像进行简单的平移后与基准图像的共同区域进行重合。