实验四:图像空间域锐化
[实验目的]
· 理解图像空间域锐化的目的和意义;
· 了解图像空间域锐化的各种方法及优缺点;
· 掌握图像空间域的邻域运算方法;
· 掌握图像锐化处理算法及流程;
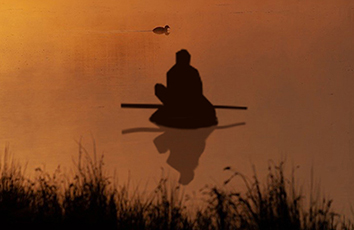
· 编程实现图像 duck.jpg 的锐化;
· 理解空间高通滤波法与其他各种图象锐化的区别和联系。
· 总结实验过程。
[实验要求]
\1. 编写图像空间域锐化程序:
· 编程对图像作各种锐化处理,编写图像空间域锐化子程序,子程序包括:梯度锐化、Roberts 锐化、Prewitt 锐化、Sobel 锐化、 Laplace 锐化及高通滤波法;
· 用不同的锐化方法处理图像,观察不同的图像锐化方法,不同模板对图像锐化的处理效果。
\2. 观察图像锐化处理结果
· 利用Photoshop 对图像实施锐化处理。分析对比 Photoshop 和自己编写的图像锐化程序处理效果不同之处,并设法改经自己的图像处理程序。
代码及处理结果
过程中采用的filter2D函数,官方文档中提及:“The function does actually compute correlation, not the convolution”,经考虑后我认为在此不考虑相关和卷积操作的具体差异,仅仅将filter2D作为代替实现核与图像相乘的手段。
不过官方文档中同样提及了转化方法:
That is, the kernel is not mirrored around the anchor point. If you need a real convolution, flip the kernel using flip and set the new anchor to(kernel.cols - anchor.x - 1, kernel.rows - anchor.y - 1).
#include <iostream>#include <opencv2/core/core.hpp>#include <opencv2/highgui/highgui.hpp>#include <opencv2/imgproc.hpp>using namespace std;using namespace cv;// 锐化方式//int method { 1.Highboost, 2.PrewittH1, 3.PrewittH2, 4.RobertsH1, 5.RobertsH2, 6.Laplace1, 7.Laplace2 , 8.SobelH1, 9.SobelH2};void Sharpen(Mat& src, Mat& dst, int method = 1){Mat kern = (Mat_<char>(3, 3)<< 0, 0, 0, 0, 1, 0, 0, 0, 0);// 根据方法确定核if (method == 1)//高频增强模板1{kern = (Mat_<char>(3, 3)<< 0, -1, 0,-1, 5, -1,0, -1, 0);}else if (method == 2)//Prewitt算子H1{kern = (Mat_<char>(3, 3)<< -1, 0, 1,-1, 0, 1,-1, 0, 1);}else if (method == 3)//Prewitt算子H2{kern = (Mat_<char>(3, 3)<< -1, -1, -1,0, 0, 0,1, 1, 1);}else if (method == 4)//Roberts算子H1{kern = (Mat_<char>(2, 2)<< 0, -1,1, 0);}else if (method == 5)//Roberts算子H2{kern = (Mat_<char>(2, 2)<< -1, 0,0, 1);}else if (method == 6)//Laplace模板1{kern = (Mat_<char>(3, 3)<< 0, -1, 0,-1, 4, -1,0, -1, 0);}else if (method == 7)//Laplace模板2{kern = (Mat_<char>(3, 3)<< -1, -1, -1,-1, 8, -1,-1, -1, -1);}else if (method == 8)//SobelH1{kern = (Mat_<char>(3, 3)<< -1, 0, 1,-2, 0, 2,-1, 0, 1);}else if (method == 9)//SobelH2{kern = (Mat_<char>(3, 3)<< -1, -2, -1,0, 0, 0,1, 2, 1);}// 处理filter2D(src, dst, src.depth(), kern);}int main(){//读入数据Mat src = imread("duck.jpg");//含两个模板(H1,H2)的需要将两个结果相加,故有dst_1和dst_2Mat dst_1 = src.clone();Mat dst_2 = src.clone();Mat dst = src.clone();cout << "多模板锐化演示开始:按任意键继续……" << endl;//高通滤波法Sharpen(src, dst, 1);namedWindow("高通滤波法");imshow("高通滤波法", dst);waitKey(0);//PrewittSharpen(src, dst_1, 2);Sharpen(src, dst_2, 3);dst = dst_1 + dst_2;namedWindow("PreWitt");imshow("Prewitt", dst);waitKey(0);//RobertsSharpen(src, dst_1, 4);Sharpen(src, dst_2, 5);dst = dst_1 + dst_2;namedWindow("Roberts");imshow("Roberts", dst);waitKey(0);//Laplace1Sharpen(src, dst, 6);namedWindow("Laplace-模板一");imshow("Laplace-模板一", dst);waitKey(0);//Laplace2Sharpen(src, dst, 7);namedWindow("Laplace-模板二");imshow("Laplace-模板二", dst);waitKey(0);//SobelSharpen(src, dst_1, 8);Sharpen(src, dst_1, 9);dst = dst_1 + dst_2;namedWindow("Sobel");imshow("Sobel", dst);cout << "展示结束,按任意键关闭程序。" << endl;waitKey(0);destroyAllWindows();return 0;}
Ps中有USM锐化,锐化,进一步锐化,防抖,锐化边缘等功能,网上多从使用角度解读,我暂不能分清楚除了USM(Unsharp Mask)以外的锐化具体是哪一种。
duck(ps中USM锐化后):
USM(Unsharp Mask)参数
参考资料
Opencv官方文档(filter2D):/master/d4/d86/group__imgproc__filter.html#ga27c049795ce870216ddfb366086b5a04图像处理中滤波(filtering)与卷积(convolution)的区别:/q6324266/article/details/52374234Photoshop的USM锐化功能详解:/jc/pmjc/ps/01/21915.htmlmgproc__filter.html#ga27c049795ce870216ddfb366086b5a04图像处理中滤波(filtering)与卷积(convolution)的区别:/q6324266/article/details/52374234Photoshop的USM锐化功能详解:/jc/pmjc/ps/01/21915.html【OpenCV学习笔记】之卷积及卷积算子(convolution):/zhu_hongji/article/details/81562746